Introduction: Building a Raspberry Pi image with Packer
Today we are test driving packer-builder-arm, this tool enables you to build a Raspberry Pi image with Packer (in addition to other ARM platforms). Packer-builder-arm is a plugin for Packer. It extends Packer to support ARM platforms including Raspberry Pi. Packer is tool from Hashicorp for automating OS image builds. Additionally packer-builder-arm enables you to build these image on your local machine, cloud server or other x86 hardware. This means you don’t need your Raspberry Pi handy to build a Raspbian ARM image. To do this it leverages arm emulation available in QEMU. Specifically it copies a statically built QEMU arm emulator into the image which allows us to run files compiled for ARM inside the chroot on an X86 system.
Why use Packer?
Why build your Raspberry Pi image with Packer? Projects with embedded devices such as a Raspberry Pi often need tweaks to the OS installation. For example you might change config files or install some packages. Manually running these commands for one device is no big deal. However repeating this process is time consuming and error prone. It does not scale well to many devices.
A common solution is to customize your OS install and then clone the SD card or storage device. This works well enough. However each time you want to tweak your configuration you still need to manually re-run the process. Iteration is manual.
This is where Packer comes in. Packer enables you to codify your OS configuration and customization. Packer builds your image for you applying your customization. You can store your Packer files in git and now you have a repeatable process. If you need to add a new package, just add it to your packer build files and re-run packer. Presto! You have a new image. You can take this even further by setting up CI/CD pipelines to run your builds automatically.
How does Packer work?
Packer Overview
Packer automates a simple but powerful concept. Start with base installation media or a base image of operating system. Boot or chroot into the image and run commands or scripts to customize it. Then capture the output in an image artifact. You can now take that image and re-use it on multiple machines.
Packer is commonly used in large scale cloud environments. In these environments you often have thousands of machines. OS image builds need to be automated and tested in an environments of this scale. The only reasonable way to achieve this is with the automation that tools like Packer provide.
Packer Plugins
Packer supports plugins for extending its functionality. Packer’s plugin architecture is quite simple. Packer plugins are just stand alone binaries or scripts that Packer executes.
Two examples of plugin types for Packer are builders and provisioners. Builders are focused on setting up the infrastructure required to build the image. Provisioners handle the changes you make at the OS level such as install package. Read the Packer plugins page for more details.
Today we are going to explore a builder plugin called packer-arm-builder.
packer-builder-arm
Packer-builder-arm extends Packer to build arm based images. Specifically it does the following:
- Fetch a base ARM os image such as Raspbian or Arch Linux.
- Run the commands you specify in a chroot environment with ARM emulation.
- Save the customized chroot environment to a new image.
It achieves this by copying the QEMU static ARM emulator into the chroot environment. This allows ARM compiled binaries in the chroot to execute as if they were running on an ARM machine. It is worth noting that this can be fairly slow compared to running directly on an ARM CPU. However it is really handy because you don’t to run on ARM hardware.
Building and installing packer-builder-arm
Prerequisites
- A modern linux system. We are using Ubuntu 18.04.
- A recent version of Go. If you need help installing Go see our tutorial: How to install Go on Linux.
- Access to the internet to install dependencies.
Step 1 – Install dependencies
Install Go. We are testing this with Go 1.13. See our tutorial: How to install Go on Linux if you need more help.
Now that we have Go installed we install the following packages:
- git
- unzip
- qemu-user-static
- e2fsprogs
- dosfstools
- bsdtar
We are using Ubuntu 18.04. Hence we will use apt to install our dependencies. If you are using a different distribution you will need to adapt these commands to install the packages on your platform. In our case we run:
sudo apt-get install git
sudo apt-get install unzip
sudo apt-get install qemu-user-static
sudo apt-get install e2fsprogs
sudo apt-get install dosfstools
sudo apt-get install bsdtar
Step 2 – Install Packer
We chose to install Packer directly from the Packer website instead of using packages available in the Ubuntu package repositories. We have a reason for this. Packer moves pretty quickly so the version of Packer in the Ubuntu repos is far behind the latest Packer. Given the rate at which cloud native tools change we want to make sure we have the latest code base. The best way to do this is get Packer directly from Hashicorp.
To install Packer we will first download the zipped binary from the Packer website using the wget command line HTTP client.
wget https://releases.hashicorp.com/packer/1.4.5/packer_1.4.5_linux_amd64.zipVersion 1.4.5 is the latest as of this writing. However I suggest you check website to see if there is a newer Packer release available.
Now that we have the Packer zip file we need to unzip it:
unzip packer_1.4.5_linux_amd64.zip You should now have a packer binary in your current working directory. Lets move it to a more permanent location. We can do this putting the packer binary in your /usr/local/bin directory:
sudo mv packer /usr/local/bin/More than likely you already have /usr/local/bin in your PATH environment variable. If you do then you should be able to run packer --help and see a similar output to what I have below.
packer --help
Usage: packer [--version] [--help] <command> [<args>]

Available commands are:
    build       build image(s) from template
    console     creates a console for testing variable interpolation
    fix         fixes templates from old versions of packer
    inspect     see components of a template
    validate    check that a template is valid
    version     Prints the Packer version
Congratulations! You have Packer installed. Time to move onto packer-builder-arm.
Step 3 – Install packer-builder-arm
In this step we are going to get the latest code for the packer-builder-arm plugin from Github. Next we will build it and then finally install it.
To clone the source code from github, use the following git command:
git clone https://github.com/mkaczanowski/packer-builder-armAfter cloning the source code we will need to change directories into the working directory, fetch go modules and build the go source code.
cd packer-builder-arm
go mod download
go build
After the go build command you should have a packer-builder-arm file in your current directory.
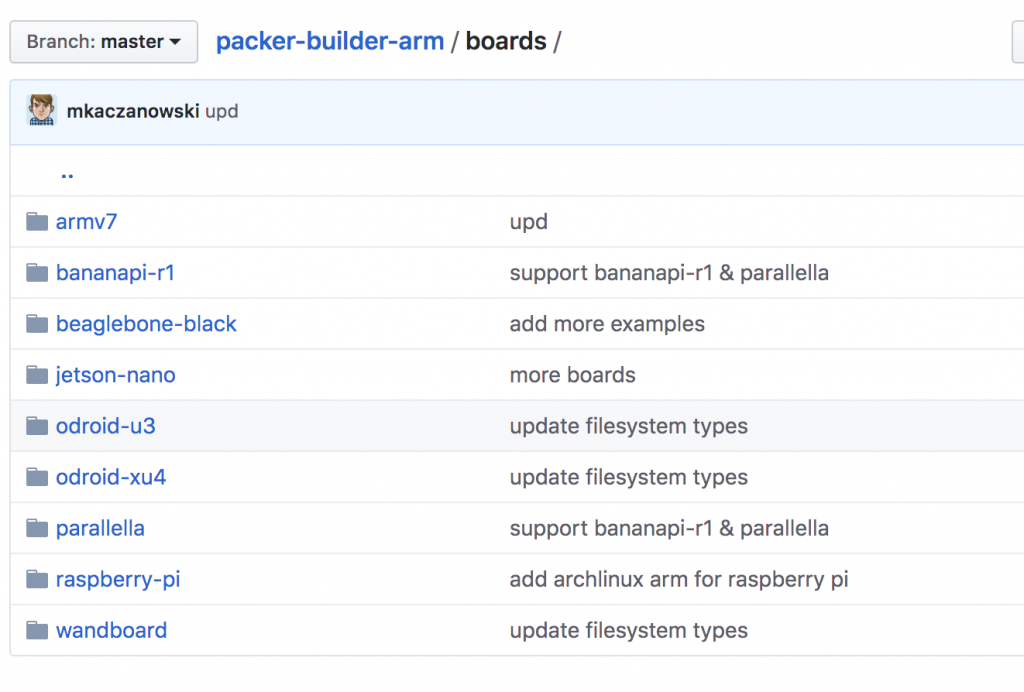
ubuntu@packer-test:~/packer-builder-arm$ ls -l
total 32484
-rw-rw-r--  1 ubuntu ubuntu    11357 Dec 13 22:04 LICENSE
-rw-rw-r--  1 ubuntu ubuntu     5097 Dec 13 22:04 README.md
drwxrwxr-x 11 ubuntu ubuntu     4096 Dec 13 22:04 boards
drwxrwxr-x  2 ubuntu ubuntu     4096 Dec 13 22:04 builder
drwxrwxr-x  2 ubuntu ubuntu     4096 Dec 13 22:04 config
-rw-rw-r--  1 ubuntu ubuntu      818 Dec 13 22:04 go.mod
-rw-rw-r--  1 ubuntu ubuntu    45835 Dec 13 22:04 go.sum
-rw-rw-r--  1 ubuntu ubuntu      268 Dec 13 22:04 main.go
-rwxrwxr-x  1 ubuntu ubuntu 33173413 Dec 13 22:23 packer-builder-arm
At this point we have a couple of options:
- Run packer from within this directory. Packer will check the current directory for plugins.
- Move the packer-builder-arm binary to
/usr/local/bin/. Packer will also look for plugins in the same directory as the packer binary. - Move the packer-builder-arm binary to
$HOME/.packer.d/plugins.
We are going to go with the first one. If you intend to use this a permanent setup, investigate the other two.
Ok. We are almost there. Time to move onto actually building the image!
Step 4 – Build the Raspbian image
This is where the power of Packer really shines. We are going to use one of the existing configurations in packer-builder-arm to build a Raspbian image. But before we do that, we need to fix a small bug that I came across with the raspian.json file.
Fix a bug in raspbian.json
Edit the file in packer-image-arm/boards/raspberry-pi/raspbian.json.
We need to update the value for image_chroot_env. Specifically we change the following line:
"image_chroot_env": ["PATH=/usr/local/bin:/usr/local/sbin:/usr/bin:/bin:/sbin"],to include the /usr/sbin directory. The line should now look like this:
"image_chroot_env":["PATH=/usr/local/bin:/usr/local/sbin:/usr/bin:/usr/sbin:/bin:/sbin"],The issue I ran into is that packer was unable to find the chroot command on my system. Chroot is in /usr/sbin so we add it the PATH variable that is being passed to image_chroot_env.
Understand the contents of raspbian.json
From within the packer-image-arm working directory, we will run the following packer command with sudo after looking at the raspbian.json file:
sudo packer build boards/raspberry-pi/raspbian.jsonBefore running the build lets figure out what the Raspbian.json is doing:
{
  "variables": {},
  "builders": [{
    "type": "arm",
    "file_urls" : ["https://downloads.raspberrypi.org/raspbian/images/raspbian-2019-09-30/2019-09-26-raspbian-buster.zip"],
    "file_checksum_url": "https://downloads.raspberrypi.org/raspbian/images/raspbian-2019-09-30/2019-09-26-raspbian-buster.zip.sha256",
    "file_checksum_type": "sha256",
    "file_target_extension": "zip",
    "image_build_method": "reuse",
        "image_path": "raspberry-pi.img",
        "image_size": "2G",
    "image_type": "dos",
        "image_partitions": [
                {
                        "name": "boot",
                        "type": "c",
                        "start_sector": "8192",
                        "filesystem": "vfat",
                        "size": "256M",
            "mountpoint": "/boot"
                },
                {
                        "name": "root",
                        "type": "83",
                        "start_sector": "532480",
                        "filesystem": "ext4",
                        "size": "0",
            "mountpoint": "/"
                }
        ],
    "image_chroot_env": ["PATH=/usr/local/bin:/usr/local/sbin:/usr/bin:/usr/sbin:/bin:/sbin"],
        "qemu_binary_source_path": "/usr/bin/qemu-arm-static",
        "qemu_binary_destination_path": "/usr/bin/qemu-arm-static"
  }],
  "provisioners": [
    {
      "type": "shell",
      "inline": [
          "touch /tmp/test"
      ]
    }
  ]
}
In the raspbian.json file we have two high level objects, builder and provisioner. The builder in this file has the following keys or parameters:
"type": "arm"– The builder type we are using."file_urls": ...– The url of the image we are using as a base."file_checksum_url"...– The url of the image’s checksum"file_checksum_type": "sha256"– The hashing algorithm used to generate the checksum."file_target_extension": "zip"– The extension of the image file."image_build_method": "reuse"– This tells the plugin if we want to reuse the disk image or create a new one from scratch."image_path": "raspberry-pi.img"– The name of the image we will create."image_size": "2G"– The size of the image"image_type": "dos"–"image_partitions":...– Contains the specifications of the partitions in the image."image_chroot_env"...– Shell environment that is passed to the chroot command."qemu_binary_source_path":&"qemu_binary_destination_path":The source where we will find the qemu static binary and the the destination path inside the chroot where we will copy it.
Additionally there is a the provisioner section which is much shorter:
"type": "shell"– This tells packer we are using the shell provisioner to configure the image."inline"...– Inline specifies an array of commands that get passed to the shell provisioner. In this case we pass one command “touch /tmp/test“. You can add additional commands here. See the shell provisioner doc for other options.
Build your Raspberry Pi image with Packer
Ok. Almost there! Let’s run the build now:
sudo packer build boards/raspberry-pi/raspbian.jsonHere is the output from my packer run:
ubuntu@packer-test:~/packer-builder-arm$ sudo packer build boards/raspberry-pi/raspbian.json
arm output will be in this color.

==> arm: Retrieving rootfs_archive
==> arm: Trying https://downloads.raspberrypi.org/raspbian/images/raspbian-2019-09-30/2019-09-26-raspbian-buster.zip?archive=false
==> arm: Trying https://downloads.raspberrypi.org/raspbian/images/raspbian-2019-09-30/2019-09-26-raspbian-buster.zip?archive=false&checksum=sha256%3A2c4067d59acf891b7aa1683cb1918da78d76d2552c02749148d175fa7f766842
==> arm: https://downloads.raspberrypi.org/raspbian/images/raspbian-2019-09-30/2019-09-26-raspbian-buster.zip?archive=false&checksum=sha256%3A2c4067d59acf891b7aa1683cb1918da78d76d2552c02749148d175fa7f766842 => /home/ubuntu/packer-builder-arm/packer_cache/665ae48e54b8fac4541688233efc4a82b75de3ce.zip
    arm: unpacking /home/ubuntu/packer-builder-arm/packer_cache/665ae48e54b8fac4541688233efc4a82b75de3ce.zip to raspberry-pi.img
    arm: searching for empty loop device (to map raspberry-pi.img)
    arm: mapping image raspberry-pi.img to /dev/loop2
    arm: mounting /dev/loop2p2 to /tmp/495303497
    arm: mounting /dev/loop2p1 to /tmp/495303497/boot
    arm: running extra setup
    arm: mounting /dev with: [mount --bind /dev /tmp/495303497/dev]
    arm: mounting /devpts with: [mount -t devpts /devpts /tmp/495303497/dev/pts]
    arm: mounting proc with: [mount -t proc proc /tmp/495303497/proc]
    arm: mounting binfmt_misc with: [mount -t binfmt_misc binfmt_misc /tmp/495303497/proc/sys/fs/binfmt_misc]
    arm: mounting sysfs with: [mount -t sysfs sysfs /tmp/495303497/sys]
    arm: binfmt setup found at: /proc/sys/fs/binfmt_misc/qemu-arm
    arm: copying qemu binary from /usr/bin/qemu-arm-static to: /tmp/495303497/usr/bin/qemu-arm-static
    arm: running the provision hook
==> arm: Provisioning with shell script: /tmp/packer-shell936190241
==> arm: ERROR: ld.so: object '/usr/lib/arm-linux-gnueabihf/libarmmem-${PLATFORM}.so' from /etc/ld.so.preload cannot be preloaded (cannot open shared object file): ignored.
==> arm: ERROR: ld.so: object '/usr/lib/arm-linux-gnueabihf/libarmmem-${PLATFORubuntu@packer-test:~/packer-builder-arm$ sudo packer build boards/raspberry-pi/raspbian.json
arm output will be in this color.

==> arm: Retrieving rootfs_archive
==> arm: Trying https://downloads.raspberrypi.org/raspbian/images/raspbian-2019-09-30/2019-09-26-raspbian-buster.zip?archive=false
==> arm: Trying https://downloads.raspberrypi.org/raspbian/images/raspbian-2019-09-30/2019-09-26-raspbian-buster.zip?archive=false&checksum=sha256%3A2c4067d59acf891b7aa1683cb1918da78d76d2552c02749148d175fa7f766842
==> arm: https://downloads.raspberrypi.org/raspbian/images/raspbian-2019-09-30/2019-09-26-raspbian-buster.zip?archive=false&checksum=sha256%3A2c4067d59acf891b7aa1683cb1918da78d76d2552c02749148d175fa7f766842 => /home/ubuntu/packer-builder-arm/packer_cache/665ae48e54b8fac4541688233efc4a82b75de3ce.zip
    arm: unpacking /home/ubuntu/packer-builder-arm/packer_cache/665ae48e54b8fac4541688233efc4a82b75de3ce.zip to raspberry-pi.img
    arm: searching for empty loop device (to map raspberry-pi.img)
    arm: mapping image raspberry-pi.img to /dev/loop2
    arm: mounting /dev/loop2p2 to /tmp/495303497
    arm: mounting /dev/loop2p1 to /tmp/495303497/boot
    arm: running extra setup
    arm: mounting /dev with: [mount --bind /dev /tmp/495303497/dev]
    arm: mounting /devpts with: [mount -t devpts /devpts /tmp/495303497/dev/pts]
    arm: mounting proc with: [mount -t proc proc /tmp/495303497/proc]
    arm: mounting binfmt_misc with: [mount -t binfmt_misc binfmt_misc /tmp/495303497/proc/sys/fs/binfmt_misc]
    arm: mounting sysfs with: [mount -t sysfs sysfs /tmp/495303497/sys]
    arm: binfmt setup found at: /proc/sys/fs/binfmt_misc/qemu-arm
    arm: copying qemu binary from /usr/bin/qemu-arm-static to: /tmp/495303497/usr/bin/qemu-arm-static
    arm: running the provision hook
==> arm: Provisioning with shell script: /tmp/packer-shell936190241
==> arm: ERROR: ld.so: object '/usr/lib/arm-linux-gnueabihf/libarmmem-${PLATFORM}.so' from /etc/ld.so.preload cannot be preloaded (cannot open shared object file): ignored.
==> arm: ERROR: ld.so: object '/usr/lib/arm-linux-gnueabihf/libarmmem-${PLATFORM}.so' from /etc/ld.so.preload cannot be preloaded (cannot open shared object file): ignored.
==> arm: ERROR: ld.so: object '/usr/lib/arm-linux-gnueabihf/libarmmem-${PLATFORM}.so' from /etc/ld.so.preload cannot be preloaded (cannot open shared object file): ignored.
==> arm: ERROR: ld.so: object '/usr/lib/arm-linux-gnueabihf/libarmmem-${PLATFORM}.so' from /etc/ld.so.preload cannot be preloaded (cannot open shared object file): ignored.
Build 'arm' finished.

==> Builds finished. The artifacts of successful builds are:
--> arm: raspberry-pi.img
ubuntu@packer-test:~/packer-builder-arm$
M}.so' from /etc/ld.so.preload cannot be preloaded (cannot open shared object file): ignored.
==> arm: ERROR: ld.so: object '/usr/lib/arm-linux-gnueabihf/libarmmem-${PLATFORM}.so' from /etc/ld.so.preload cannot be preloaded (cannot open shared object file): ignored.
==> arm: ERROR: ld.so: object '/usr/lib/arm-linux-gnueabihf/libarmmem-${PLATFORM}.so' from /etc/ld.so.preload cannot be preloaded (cannot open shared object file): ignored.
Build 'arm' finished.

==> Builds finished. The artifacts of successful builds are:
--> arm: raspberry-pi.img
ubuntu@packer-test:~/packer-builder-arm$
As you can see some errors were reported, specifically:
==> arm: ERROR: ld.so: object '/usr/lib/arm-linux-gnueabihf/libarmmem-${PLATFORM}.so' from /etc/ld.so.preload cannot be preloaded (cannot open shared object file): ignored.You can safely ignore this error if you received it. It is due to the $PLATFORM variable not being set in the environment. This does not impact the image build.
I now have a Raspbian image for my Raspberry Pi. Lets check the size using the du command:
ubuntu@packer-test:~/packer-builder-arm$ du -hs raspberry-pi.img
3.6G    raspberry-pi.img
You can now dd this image to an SD card and boot it on your Raspberry Pi.
Conclusion
To build a Raspberry Pi image with Packer and packer-builder-arm takes a bit of upfront work. However once working it is a very powerful tool. For a next step I suggest adding your customizations to the shell provisioner section to build and image that meets your needs. I plan on using this to automate the image build for my Raspberry Pi PXE boot tutorial.
Learn more about Packer
If you are interested in learning more about Packer we suggest you check out James Turnbull’s book on Packer.

Hi, first of all thank you very much for this manual!!
I’m trying to fix the $PLATFORM errors you said but not understanding where should exists the variable, “not being set in the environment” with environment you mean in the host PC that executes Packer or in a Packer config file or something and which are the possible values?
Thank you very much in advance
Hi thanks for the comment. The error messages should not cause any problems with your image build, you can safely ignore them. It would be nice to fix them but not required. I believe the error is caused because the dynamic linker expects the environment variable $PLATFORM to be set. But it is not set. It could be related to this bug in QEMU https://bugs.launchpad.net/qemu/+bug/1813034 but I have not dug into much since it does impact the image build. Let me know if you figure it out.
Just realized I missed answering a few of your questions. The Raspberry Pi 4 is a cortex-a72 which according this page https://en.wikipedia.org/wiki/List_of_ARM_microarchitectures means platform should be set to “v81”. I don’t know if setting it in the packer environment will work. It is a worth a try.
Hi, thank you for your quick response! In the meantime I arrived also to this bug description so I tried another workaround that worked … It was install a more recent version of qemu-user-static as the error seems solved since 1:4.0. As I’m running a virtualbox Ubuntu, just installed by hand:
wget http://security.ubuntu.com/ubuntu/pool/universe/q/qemu/qemu-user-static_4.0+dfsg-0ubuntu9.1_amd64.deb
dpkg –install qemu-user-static_4.0+dfsg-0ubuntu9.1_amd64.deb
As you said, in fact it wasn’t my problem … I mean, my real problem is that when running the generation of the image (whole stack is run the packer build inside a virtualbox ubuntu) the generation process get stucked after running provisioning shell script; I saw the previous errors so I tried to solve them if they were related but as you said, they are not blocking.
The thing is that if I run the packer build without a provisioners node inside the packer json file, it not get stuck and finish ok.
Have you faced some kind of similar problem when adding provisioners to this process?
Thank you!!
Hi again, just in case, I’ve created the issue on Github to comment there easily 🙂 https://github.com/mkaczanowski/packer-builder-arm/issues/4
Hello,
Can you share your whole yaml file? Maybe post it on the github issue?
Hi sure! here it is, https://github.com/mkaczanowski/packer-builder-arm/issues/4#issuecomment-572801258
I think you’re refering to the packer json file instead of yaml right?
Mainly I’m using more or less the same versioned at the repo on raspbian with a little change adding provisioner actions
ups sorry, copy pasting… obviously, previous comment with the github link is from myself, RaspiFan, not linuxhit
sure, here it is, https://github.com/mkaczanowski/packer-builder-arm/issues/4#issuecomment-572801258
Hi,
I was following your guide but I ran into some issues…
When I run the packer command I get this error:
Failed to initialize build ‘arm’: error initializing builder ‘arm’: fork/exec /usr/local/packer: permission denied
I run on Debian 10 using the latest Packer 1.5.1
I placed the compiled packer-builder-arm binary in the packer folder: /usr/local/packer
It makes no difference if I run as root or as Sudo
Would you know what could cause this?
Best Regards,
Jeroen
Can you check the permissions on the /usr/local/packer file? Make sure you have execute permissions. If you don’t try “chmod +x /usr/local/packer”.
Yes that is all ok…
I reverted to the version in your tutorial: 1.4.5
and now it all works fine…
Do you know what I need to do to make the / partition larger?
I try to install OpenCV and I need more space.
I tried:
“image_size”: “16G”,
and
“size”: “15G”, for mountpoint /
But it does not seem to make any difference
I am hitting a similar issue. Any luck with increasing the partition size?
Hi, last time I had image size problems, I’ve changed the `image_build_method` to “resize” and it worked for me.
Hi,
Amazing tutorials. I am a newbie and I find your RPi 4 PXE and this one really handy ! So thank you for these.
But I don’t understand the following: “I plan on using this to automate the image build for my Raspberry Pi PXE boot tutorial.”
Does this mean you are planning to automate the RPi PXE server configuration using Packer the way you did in this tutorial ? Or will you also configure EEPROM PXE client this way ? If so, how ?
Again, thanks for these tutorials !
Hi,
do you maybe plan to do a tutorial using packer-builder-arm to build for the Coral dev board?
Nice and concise tutorial btw 🙂
It would be good if you covered how to run raspi-config as part of this. This would allow for setting up the various hardware interfaces. Also, what a step for network settings would be useful too.